Browsing Category

Preserving Know-how

Preserving Know-how/ Preserving Recipes/ Summer

Chive Blossom Vinegar

The blossoms of chives are bountiful at this time of year. While blossoms can be used to adorn salads, soups, or meats, they can also be used to create a flavourful shelf-stable vinegar to please the pallet the whole year through.

I make many herb vinegars, but I love the chive blossom vinegar for its gorgeous rosy colour and delightful taste. Once it is ready, it will make a super vinaigrette or an addition to a sauce to brighten the taste. Because vinegar is acidic (at least 5%), it is an environment unconducive to most bacteria. It is possible for some yeasts and molds to grow in this environment so if you notice mold or see bubbles indicating yeast fermentation, don’t use it. But overall, herb vinegars are safe. I’ll note that herb infused oils are another story. Oils with herbs and/or garlic create an environment highly conducive to the worst bacterium clostridium botulinum (you got it – the botulism bacteria). It is possible to safely produce herb-garlic infused oils by acidifying the herbs and garlic, but please refer to the National Centre for Home Food Preservation for specific instructions about how to do it safely.

Making chive blossom vinegar, like all herb vinegars, is a two-step process. First, the sanitized herbs are placed in a sterilized Mason jar (warm) and hot vinegar is poured over. The mixture is left to steep for 2 weeks although you can decide to use a shorter time if you wish. At the end of the steeping period, the blossoms or herbs are strained out. I use two steps: First, strain using a sieve reserving the liquid. Second, pour the liquid through a dampened coffee filter to remove small sediment. The second phase of the process involves sterilizing the glass jars you will use to store the vinegar and heating the herb-infused vinegar to just below boiling point. Then de-cant the vinegar into the warm jars or bottles leaving a ½ inch headspace. Cool, put on lids, caps or corks, label and store in a cool, preferably dark location.

The particulars:

For chive blossom vinegar I use white wine vinegar and about ½ cup of blossoms for 500 ml. It’s really a matter of how many blossoms I can get my hands on.

Sanitizing solution: Blossoms or herbs should be knocked gently to remove insects or debris. It is recommended that they be quickly submerged in a solution of ½ tsp household bleach to 3 cups water, then thoroughly rinsed and patted dry.

Jar sterilization: Use the dishwasher cycle if you have it or submerge the jars or bottles in boiling water for 10 minutes. Invert on a towel and fill with the hot vinegar while warm. If you are using bottles with corks, use only new corks and sanitize them by dipping them in boiling water 3 or 4 times.

Getting creative: As the herbs begin to produce, it’s possible to create various infused vinegars. Strong herbs blend well with apple cider vinegar or even white vinegar. Milder herbs like chives, basil, tarragon blend well with white wine or champagne vinegars. Fruits also make super vinegars. You can experiment to determine what you enjoy.

The chive blossoms are here and ready to be used as culinary accents or to be infused into vinegar for a gloriously tinted vinegar with a gentle chive background ready to elevate your vinaigrette to new heights!

preservingwithmartha@gmail.com


Preserving Know-how/ Spring

Ode to Spring: Asparagus on Mother’s Day

When tulips bloom, Mother’s Day approaches, and asparagus pops its head up, we know it’s spring.  Asparagus is the first real ‘crop’ of the season. This vegetable is filled with high levels of Vitamin C and A is high in folacin. In contrast with some European countries, we grow only four acres of white asparagus which is grown underground to prevent chlorophyll from turning it green. No complaints here. I love green asparagus.      

To store fresh asparagus, snip the ends, and place spears in a Mason jar filled with about an inch of water. Loosely cover with a plastic bag. Alternatively, snip the ends, cover ends with a damp towel and wrap in plastic wrap. They will hold for about 4 days.

 Asparagus is a low acid vegetable which means the only way to preserve it is through pressure canning. However, asparagus doesn’t hold up well to high prolonged heat so it is better to preserve by freezing or pickling.

 Freezing asparagus is simple and effective. It requires blanching the vegetable in boiling water or steam for about 3 minutes and then sending the spears into an ice-water bath for 2 minutes. Blanching is critical to the process as it prevents an enzymatic action that is responsible to turning the vegetable brownish and diminishing its flavour and texture.

 Pickled asparagus is a great snack or addition to a salad throughout the year. I pickled in 500 ml wide-mouth Mason-style jars. The spears need to be cut to about 4 inches to fit in the jars. That means there is always a little left. I pickle those little bites as well as is shown in the photo. Waste not, want not as the adage goes!

When it comes to cooking asparagus, it starts with prepping the vegetable. Asparagus produces lignin that causes the woody stem end. When you snap off the woody end, it naturally snaps to the tender part of the vegetable. So, snap the asparagus just before cooking. To retain the green (chlorophyll), texture and taste, cook quickly in a steam basket or boiling water for about 2 – 3 minutes. I often do this in advance of a meal and then give them a quick sauté in butter just before serving. Cold asparagus is also great for a summer meal or buffet.

Since it’s Mother’s Day, why not spoil a mother you know and love with eggs Benedict and steamed asparagus. Make a quick and simple, no-fail Hollandaise sauce in the microwave! Really, it works beautifully. Serve on an English muffin, toast, crumpet, scone or O’Dough’s gluten-free bagel.

Let’s celebrate spring with beautiful asparagus. Happy Mother’s Day to all.

preservingwithmartha@gmail.com

Quickie Hollandaise Sauce

1 Star2 Stars3 Stars4 Stars5 Stars (No Ratings Yet)
Loading...

Ingredients

  • ½ cup butter softened
  • 3 large egg yolks (freeze the whites for a future meringue)
  • 1.5 TBSP fresh lemon juice
  • S&P to taste

Instructions

1

In a microwave safe bowl, put softened butter. In a separate bowl mix together lemon juice and egg yolks. Let them rest together for a minute or so. Add to the butter and mix. Put the mixture in the microwave and ‘cook’ on high for 15 second bursts. Stir between bursts. It took 4 bursts of 15 seconds to produce a perfect Hollandaise. Add salt and pepper and fresh garden chives.


Preserving Know-how

Time to Dust Off the Canner!

It’s spring and preservers are chomping at the bit in anticipation of canning season. Here are a few tips and ideas to ready yourself for the task.

Check your Canners:

Whatever canner you use, it needs to be checked over once a year. For water bath canners and atmospheric steam canners, check for rust and ensure they are clean. Pressure canners need to be inspected to ensure the gaskets are still clean and pliable. Remember that dial gauge types need to be pressure tested once a year.

Check Canning Equipment:

Do an inventory check of equipment. A funnel, bubbler, implement to measure headspace, jar lifter, cooling rack, and general kitchen utensils. Assess your jar collection and lids. Only Mason-style jars are recommended for home canning and new lids are required for each batch unless you are using Tattler lids which are reusable. The least expensive canning jars are Country Classics (Home Hardware) and Golden Harvest (sold at Canadian Tire and Walmart). Large volumes of lids can be purchased at Misty Meadows in Conn.

Make a Plan:

I know deciding what to preserve depends on what the gardens provide. Being flexible is important but having a plan doesn’t hurt. Check your pantry. Canned goods are good for 2 years if the seal has remained. Sort through what you have, removing items that are old, moving items to the front that should be soon used. Note what remains and where the gaps are. You might start a journal to record what you make, recipe sources, and dates. Finally check your resources. Use recipes that are developed in test-kitchens. There are many internet sites that should not be relied on for safe recipes. Use Bernardin, Ball, Test Kitchens of America, Canadian Living and digital resources like The National Centre for Home Food Preservation or Healthy Canning. One of the best parts of preserving is reading recipes!

Check Your Altitude:

Altitude is critical to proper, safe canning practice. Altitude affects boiling point. The higher the altitude the lower the boiling point which means it takes longer to properly process your preserves. High quality reference books and online resources will indicate how to adjust processing times based on altitude. I live in Kimberley where the altitude is 843 ft. Most recipes give processing times for altitudes between 0 and 1000 ft. Therefore, I can use the processing time as published. But if you live in the Dundalk Highlands your altitude is 1735ft. At this altitude you would need to increase the processing time by 5 minutes. This applies to pressure canning too where pressure needs to be increased (10 to 15 lbs for example). So, google your altitude or put your address into mapdevelopers.com and consider this part of preparedness for canning this season.

We are all looking forward to dusting off the canners and getting into the kitchen with fruits and vegetables from our gardens. This is the time to take stock of your gear and make a plan to fill your pantry for family and friends!

preservingwithmartha@gmail.com


Preserving Know-how/ Preserving Recipes/ Spring

Spring Greens and Dressing

With the unusually warm weather we’ve had, the greens are peeking up heralding the delights of spring salads, lighter meals, and herb-infused dressings. There’s nothing like the taste of spring greens in a simple dressage. They are bright, fresh, full of taste and texture and make a super meal as the days warm.

If you got a jump-start on planting by starting seeds indoors, you might already have arugula and spinach. If not, you will soon will as the garden grows. Or stop by the Kimberley General Store or Sideroad Farm for fantastic spring greens. Soon asparagus will be out too, according to Farmer Morris in Barrie. And who can say no to ramps, young Dandelion leaves, purslane, colourful violets and the myriad herbs shooting up. We’ve got the makings of a great salad!

So that brings us to the question of vinaigrettes. What dressing suits the beautiful fresh spring salad? Many say, “keep it simple”. The taste is really in the greens so don’t cover it with big bold flavour. According to many chefs, a good vinaigrette is all about balance: acid to oil, sweetness to salt, an emulsifier and seasoning to taste. In general terms, the ratio of acid to oil is one to three. It isn’t essential to add an emulsifier like mustard, but it does help to make a creamier dressing. For sweet balance, go easy: just a dash of honey, maple syrup, a small teaspoon of home-made jam, jelly, or conserve, or even honey-mustard can do the trick. If you want to add minced shallots, or wild leeks, chopped herbs or zest of citrus, go for it.  I make herb vinegars like tarragon or chive blossom which adds a subtle flavour to the vinaigrette, but you can use white wine vinegar, white balsamic, apple cider, red wine, rice wine, balsamic, sherry or champagne vinegar. There are no doubt great recipes around, but here’s mine to go with a young spring salad.

preservingwithmartha@gmail.com

Spring Salad Dressing

1 Star2 Stars3 Stars4 Stars5 Stars (No Ratings Yet)
Loading...

Ingredients

  • 1 TBSP herb vinegar (choose what you have)
  • 3 TBSP cold pressed olive oil
  • 1 tsp Dijon mustard (or use honey-mustard for sweetness)
  • ¼ tsp honey (or switch up the sweet addition – whatever moves you)
  • Salt and pepper to taste.

Instructions

1

Sometimes I add more Dijon for a more mustardy dressing like you might find in a French bistro. If you increase mustard, remember it is salty so adjust the S&P at the end just before serving.

2

Whisk the dressing in the salad bowl for 30 seconds before adding the greens. Gently toss the greens with your hands. Season.

3

For the greens, collect or purchase young spring greens. Add Dandelion leaves and chopped wild leek leaves if you have them. Colour is important so adding violets (unsprayed of course), Dandelion petals or chive blossoms is a great idea. Make it a meal? Sure, add steamed or grilled asparagus, goat cheese, shaved parmesan, hard boiled eggs quartered, toasted nuts, good quality tuna in oil, or add grilled fish or meat on the side. And voila’, a salad to celebrate Spring.


Preserving Know-how/ Spring

Putting the Maple into Conserves

It is time for the first harvest of the year! Yes, maple syrup is running and folks are busy in their sugar shacks preparing the liquid gold. Canada produces 85% of the world’s maple syrup and production is growing. 2022 was the largest production year in history with 211 million pounds of syrup generating 1.1 billion dollars for the Canadian economy. I guess we should all give thanks to the maple forests and to all the producers, large and small, for adding to our culinary delights as well as our economy.

If you watched the Netflix series called “dirty money” you will have seen an episode on the great Canadian maple syrup heist! Over the course of a few months in 2011-12, 9,571 barrels of maple syrup were stolen from a large Quebec storage facility. The take was estimated to be valued at $18 million dollars. The perpetrators were eventually discovered, fined, put on probation, or jailed.  Not quite the Great Train Robbery of Great Britain, but still a good story for the Canadian history books. It’s certain this caper underscores how valuable maple syrup is.

There are so many wonderful ways to use maple syrup in cooking, it’s difficult to choose one focus. I think of maple syrup as rich in taste and texture. To me, it has a natural affinity with the richness of conserves.

Conserves are jams kicked up a notch or two. They generally have the addition of dried fruit and/or nuts. Sometimes citrus or spices are added. They can be either sweet or savoury. The sweet ones are excellent with scones or cheeses. Savoury ones are good accompaniments to meats or charcuterie.

Recently I’ve made a couple of great conserves with maple syrup. One combined maple syrup and blueberries with walnuts. It was so good my friend said she simply ate it by the spoonful. This week I made a very nice recipe published by Foodland Ontario for Maple Walnut Pear Conserve (slightly adapted below). Winter pears like Anjou, Bartlett or Bosc are available and can sometimes be found at reasonable prices. Bake up some biscuits or scones and enjoy this winter preserve.

Maple syrup on pancakes or ice cream, thrown in the snow to make maple-sicles, added to a recipe in lieu of brown sugar or profiled in a lovely winter conserve, maple syrup can’t be beat as one of nature’s great gifts.

preservingwithmartha@gmail.com

Maple Walnut Pear Conserve

1 Star2 Stars3 Stars4 Stars5 Stars (No Ratings Yet)
Loading...

Ingredients

  • Yield 6 cups
  • 4 cups chopped peeled winter pears
  • 1 TBSP lemon juice
  • 1 package regular pectin crystals
  • 3.5 cups sugar
  • ¾ cup maple syrup
  • ½ cup chopped walnuts toasted (option: omit nuts and add ½ cup dried cranberries, raisins, or cherries)

Instructions

1

In a pot, mix pears with lemon juice. Stir in pectin with ¼ cup of the measured sugar. Bring to a boil stirring constantly. Add remaining sugar and return to the boil. Boil hard 1 minute. Remove from heat, stir in maple syrup and nuts. Ladle into hot 250 ml jars leaving ¼ headspace. Clean rims of the jars and attach lids and rings to “finger-tip” tight. Process in a water bath or atmospheric steam canner for 10 minutes adjusting for altitude. Turn off heat, remove canner lid and let jars rest in the canner for 5 additional minutes. Remove jars to a heat proof surface and let rest for 24 hours. Check the seal. Label and store.


Preserving Know-how/ Spring

Spring Into Gardening: Plan A Tea Garden

I have been a keen vegetable gardener for years, but during the pandemic I turned my attention to creating a tea garden. My interest has continued because herbal teas (technically called tisanes) are super tasty, have healing powers, are easy to grow and create a sort of Zen feeling when growing, foraging, preserving, and enjoying.

Tea gardens and even “bartenders’ gardens” are currently on-trend. I started my tea garden with some basics but this year I am eager to learn more and expand. I got in touch with my friend and neighbour Ben Caesar who owns Fiddlehead Nursery outside of Kimberley. His expertise is perennial edibles. While talking with Ben I thought about three ways to approach the tea garden: foraging, perennials, and annuals.

Some of Ben’s picks and suggestions: Common perennial herbs enjoyed for tea include Bee Balm (bergamot), lemon balm, angelica, camomile, anise hyssop, sweet and bronze fennel, sweet Sicily, lavender, and the various mint varieties. Ben loves chocolate mint. I also have spearmint and peppermint which I enjoy in combination as a tea or used for mint jelly. Mint is a vigorous spreader as I’m sure you know, so it is best to create barriers to prevent their spread. I used old paper planting pots buried in the garden. Ben uses aluminum flashing buried vertically to 1 inch above the ground which works very well. Other perennials and annuals such as rosemary, thyme, sage, lemon verbena and coriander are also great additions to teas. And let’s not forget flowers! Rugosa roses are used both for petals and hips, echinacea flowers boost the immune system, cooked Elderberry flowers made into syrup are good as a cold tonic, marvelous blue mallow magically changes to pink with the addition of lemon juice.

From the natural environment, there are many easily found herbs and plants that are used for teas. Dandelion leaves, dried roots and flowers are more than a garden weed! Don’t spray! Dandelion is good for you! Stinging nettle is a tasty edible and immune system booster. Common sumac (not poisonous sumac) makes a pretty pink healthy tea. The basswood flower and wild mint (also called corn mint, river mint) are also good for tea. Wild blackberry or raspberry leaves and fruit add sweetness to tea, and many other plants can be foraged using a reputable foraging guide.

Use fresh herbs and plants or dry for later use. Your basic brew is 1 TBSP fresh chopped herbs or 1 tsp dried to 1 cup of boiling water stepped for 10 minutes.

Why not expand your tea garden with annuals, and perennials and add to the harvest some foraged herbs and plants. To find out more check out:

www.fiddleheadnursery.ca  How to create an edible, perennial landscaping

www.richters.com Extensive information about medicinal and culinary herbs

www.ontarioculinary.com Ten things to Forage in Ontario: An edible timeline

If you already grow a tea garden, share your top picks with us! If you’re new to gardening, try a tea garden in a pot, on a terrace or in your veggie or flower garden. Plan ahead so when the spirt moves, you can put the kettle on and enjoy a wholesome and tasty brew.

Note: Remember that most herbs have medicinal effects and may have contraindications like avoiding catnip during pregnancy or avoiding specific herbs when taking certain medications. Check with a pharmacist or herbalist.

preservingwithmartha@gmail.com


Preserving Know-how/ Winter

Hot Cocoa and Marshmallows

t’s Spring break and the snow has returned to remind us winter is not yet over. If you are out enjoying winter activities, there’s nothing like coming home to a cup of hot cocoa topped with marshmallows. Making your own marshmallows is not difficult, and it’s fun and yummy. Also, you can make them without additives found in the commercial variety.

It is fascinating that both marshmallows and hot cocoa drinks have their origins 2000 years ago but in different parts of the world. Drinking chocolate was an important part of Mayan culture where it was generally served cold. On the other side of the world, in Egypt, marshmallows were created by extracting sap from the mallow plants which grew in marshes. The mallow sap was used for medicinal purposes during the 15th and 16th centuries before it found its way into the fluffy form in the candy shops of France during the 18th century. It wasn’t until the mid 1900s when commercial marshmallows were created thanks to the invention of the extrusion apparatus. It seems that cultures around the world have enjoyed cocoa and marshmallows for millennia.

Making marshmallows at home requires a little equipment and a touch of patience but it is worth the effort!

Join the centuries long tradition of hot cocoa and marshmallows. Top a mug of hot chocolate with a homemade marshmallow or stoke the bonfire and have a s’mores party to celebrate the holiday.

Warning: I gave a bag of marshmallows to a friend to take home to her family. She ate the whole lot before getting home! Really, they are that good!

preservingwithmartha@gmail.com

Marshmallows

1 Star2 Stars3 Stars4 Stars5 Stars (No Ratings Yet)
Loading...

Ingredients

  • 1 cup cold water divided                               
  • 3 packages gelatin
  • 1.5 cups sugar                                                
  • 1 cup light corn syrup
  • ¼ tsp salt                                                        
  • ¼ cup cornstarch
  • ¼ cup icing sugar                                           
  • vegetable spray

Instructions

1

1. Pour ½ cup cold water in bottom of a stand mixer with whisk attachment. Sprinkle gelatin on top and allow it to soften for 15 minutes.

2

2. Prepare a 9 x 13-inch pan: Lightly spray with vegetable spray. Mix icing sugar and corn starch and dust the pan heavily with half of the mixture.

3

3. In a pot, place sugar, remaining ½ cup water, corn syrup and salt. Bring to a boil. Swirl the pan but don’t stir. This syrup needs to reach exactly 240 degrees.

4

4. On low speed, mix the gelatin mixture and gradually add in the hot syrup.

5

5. Turn the mixer on high and beat for 13 minutes. Add vanilla.

6

6. Spray a spatula with vegetable oil and quickly dump the marshmallow mix into the pan. Smooth the top. Sprinkle the top with the remaining icing sugar-cornstarch mix. Cover with a tea towel and let rest to dry for 24 hours.

7

7. Turn the marshmallows onto a large cutting board and cut large or small cubes using either a chef’s knife or pizza cutter sprayed with vegetable oil. Make sure the cubes are well covered with the icing sugar-cornstarch mixture to prevent sticking. The marshmallows will last 2-3 weeks but they won’t because they are just too darn good!


Preserving Know-how/ Winter

Winter Salad

Winter Salad

Although I love summer salads, winter is a great opportunity to be a bit creative. Some people continue to grow greens indoors through the winter but many of us depend on market or grocery store produce. Hardy greens like kale, spinach, arugula mixed with radicchio, or a touch of endive add some bitterness that can be balanced by adding fruit or a citrus vinaigrette. Shaved or grated root vegetables with or without cabbage or bok choy can provide a colourful salad. Apple, celery, and fennel with a cider vinaigrette is a favourite topped with toasted walnuts. Adding nuts and cheese to the salad or roasted vegetables like squash or sweet potato can be a nourishing and satisfying dinner.  In winter, I think we appreciate great colour, texture, sweet-tart balance, and variety in our salads more than at any other time of year.

 In late summer, I made this “Winter Salad Pickle” from garden vegetables. It was so good, and, in such demand, I have since made five more batches including one last week. I happened to find a two-for-one sale on cauliflower and couldn’t resist making one more batch. This pickle is good on its own, as an accompaniment or on top of a salad of winter greens. Even folks who aren’t keen on vegetables (aka my husband) like this pickle. The recipe was created by Canadians Top and Howard, authors of the Small-Batch Preserving books. It can be doubled if you have the produce and the space in your canner.

 Whatever salads you are enjoying this winter, try adding this “Winter Salad Pickle” to your repertoire. The colour combination and nice crunch add some sunshine to the winter meal. Bon Appetit.

Winter Salad Pickle

1 Star2 Stars3 Stars4 Stars5 Stars (No Ratings Yet)
Loading...

Ingredients

  • 2 cups cauliflower florets
  • 1 cup pearl onions or small onions quartered
  • 1 cup thickly sliced celery
  • 1 cup sliced carrots
  • 1 cup thickly sliced zucchini (remove seedy centres)
  • 1 cup yellow or green beans trimmed and cut into 1-inch pieces
  • 1 cup red peppers cut into 1-inch squares
  • (a total of 8 cups of vegetables)
  • 3 cups white wine or herb vinegar (at least 5% acid)
  • 1.5 cups sugar
  • 1 1/3 cups water
  • 2 tsp pickling salt
  • 1/8 tsp paprika

Instructions

1

In a bowl place cauliflower, onions, celery, and carrots. In a second bowl place zucchini, beans, and peppers. Combine the vinegar, water, sugar, salt and paprika in a large pot and bring to a full rolling boil. Add the cauliflower, onions, celery, and carrots. Bring back to a boil. Turn off heat and add remaining vegetables. With a slotted spoon fill hot canning jars to ½ inch headspace. Ladle in the brine. Remove air bubbles and adjust headspace. Clean the jar tops, affix lids and rings to finger-tip tight. Process jars in a water-bath canner or atmospheric steam canner ten minutes for 250 or 500ml jars and 15minutes for liter jars. As always, adjust for altitude and follow reputable canning instructions to ensure safe processing.


Preserving Know-how/ Winter

Tomatoes in Winter

Tomatoes in Winter

Tomatoes in Winter

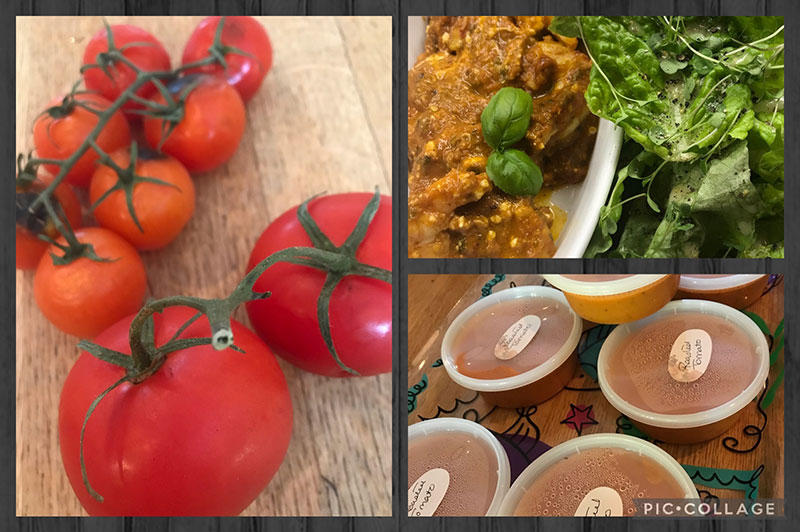
If you’re a preserver, this is a great time of year to crack out the tomatoes in whatever form you have them. Like many of you, I can, dry, freeze, or turn them into a pesto-like format after roasting with garlic and olive oil. My motto is “never waste a tomato” regardless of season.

Being over-loaded with frozen roasted tomato sauce I made deliveries to friends and my daughter-in-law. Of course, the tomato sauce is delicious with pasta, but my daughter-in-law asked about ideas for using the sauce without pasta (New Year’s resolution!). So, here is what I shared.

Tomato Sauce

Use your own tomato sauce or begin with canned or frozen tomatoes, seasoned, and reduced to a thick sauce. Add fresh or dried herbs such as parsley, basil, oregano. The recipes below are for two, but you can double or triple the size depending on the number of mouths you are feeding.

Tomato Poached Halibut or Cod

Place one cup tomato sauce in a skillet. If too thick to simmer without burning, add a couple of TBSP of water. Cut the fish into 3-4 oz pieces. Season them with salt and pepper. Put them in the simmering sauce and cook for about 8 minutes with the lid on. Spoon sauce over top.

Mediterranean Shrimp

Prepare sauce as above. Add ½ tsp of oregano. Once simmering, place cleaned and deveined large shrimp into the pan in a single layer. Cook for 3 min and flip. When you flip the shrimp add crumbled feta cheese (about 1 oz per person). Cook for another 3 min. The feta will melt making a creamy sauce. Serve fish or shrimp with salad, bread or atop of rice.

Quick Baked Parmesan

Slice zucchini and eggplant in long strips. Salt the eggplant for 15 minutes. Put veggies on parchment paper and bake at 400 until they are cooked with crispy edges. Put the sauce under and over the veggies in layers like lasagna. Top with fresh mozzarella and a hefty sprinkle of parmesan. Bake 20 min or until the cheese is melted. 

Poached Eggs in Tomato Sauce

Many cuisines around the world have a recipe for poached eggs in tomato sauce. In Mexico, you will find the delicious dish called “divorced eggs” using both tomato and tomatillo sauces. In Africa and Israel, the Shakshuka is a dish of poached eggs in spicy tomato sauce often with chopped vegetables, cumin, hot peppers and feta cheese. The dish is served in the cast iron or other frying pan with sour dough bread to mop up all the yummy sauce and eggs. You can create your own version of poached eggs in tomato sauce and serve for breakfast or dinner.

Tomatoes are most wonderful in the summer and early fall but having them in the pantry or freezer through the winter months is not only handy, but cost-effective and healthy. This is the season to celebrate the versatility of this fruit. Enjoy.

Share your ideas for tomato sauce without pasta! Send them along to me at:

preservingwithmartha@gmail.com


Preserving Know-how/ Winter

Soup’s On!

Soup

We’ve certainly had some remarkable weather ups and downs, but we know the New Year will bring cold temperatures, snow and a desire hunker down. How better to enjoy winter than with a steaming hot bowl of soup and some homemade bread?

According to culinary history, the word soup dates to post-classical Latin “suppare” or soak. The term later appeared in the French language as “soupe”. In the Middle Ages cooks spoke of soup as any liquid that was poured over bread. The word supper is also derived from this term. In general terms, “soup” applies to any liquid, savoury dish. All cultures have soup as a culinary foundation.

If you’re going to the effort of making a big batch of soup, why not make extra for later use? To preserve soup, there are basically three methods: Freezing, dehydrating or pressure canning.

Freezing

The easiest, least time-consuming method is to freeze. Freeze soups in a wide-mouth Mason jar or food grade plastic freezer container. Leave an inch headspace to allow for expansion. To prevent ice crystal formation, crinkle up some parchment paper and place it on top of the soup. Always cool the soup, then refrigerate before freezing. Label and date the frozen soup. Thaw in the fridge and heat to 165 degrees before serving.

Dehydrating

Most of us have bought a “Cup of Soup” or Lipton package of soup. These are examples of dehydrated soups, and this can be done at home. One approach is to dehydrate vegetables, cooked rice or potatoes, and seasoning. Rehydrate in boiling water. Broth and soups can also be dehydrated after reducing to a condensed or pureed form and then laying out on a Silpat sheet or parchment lined rack in the dehydrator as you would do when making fruit leathers. The dehydrated broth can be ground into a powder or simple broken up into pieces and stored in a cool, dark, dry place. The dehydrated soup puree can be stored as you would a fruit leather.

Pressure Canning

Because soup is made with low acid foods like vegetables, meat, poultry, and fish, pressure canning is necessary for safe long-term storage. Pressure canning raises the internal temperature to 240 degrees which is required to kill heat resistant bacteria such as those that cause botulism. Always follow reputable recipes and proper methods (see Bernardin, National Center for Home Food Preservation or refer to “So Easy to Preserve”). There are many soups suitable for pressure canning making instant meals easily accessible from the pantry in a matter of minutes. Do not pressure can soups made with pasta, rice, flour, cream, milk, or any thickening agents as these agents interfere with heat penetration and therefore safety. You can add them just before serving if you wish.

Winter is the time for hot soup and crusty bread. Home-made stocks and broths, hearty chowders, simple garden vegetables or instant soup mixes ready for winter camping can all be available for quick suppers, lunches, or picnics. Call the family: “Soups on”.